The best advise I can give anyone planning a trip to Nikko, Kyoto and Osaka via Japan Rail Pass is to PLAN AHEAD, especially if you will not be joining any tours and plan to visit the sights on your own. There are 2 Japan Rail passes available - one for 7 days for $240 and another for 14 days for less than $500. We only had time for 5 days of the 7 day pass. When purchasing your Japan Rail Pass online, you can also avail of the pocket wifi. Unfortunately for us, there were no more pocket wifis available. If there are available, it’s worth renting for the week you will be there. Fortunately, some of the Airbnb accommodations we stayed at, provided us with the use of the pocket wifi. It helped as a GPS in locating sights, as well as finding good restaurants in the area, and acts as your guide to the various sights.
Going online and researching the best sights to see given the amount of time you have per city is also key. I used Japan-guide.com and Visit a City websites in selecting what sights to see in a given day. Because my son had booked to see my nephew and his girlfriend in Tokyo for the first night, I had to plan a place that could see for the day because we had to return to Tokyo that night. My friend suggested for us to go to Nikko, since it was relatively close to Tokyo. That meant we needed to book our accommodation that night in Tokyo. The next three nights will be allocated for Kyoto, and the last night in Osaka before returning to Yokohama, where my son was based. Once I decided on what we were going to see, it was time to book our accommodations.
Going online and researching the best sights to see given the amount of time you have per city is also key. I used Japan-guide.com and Visit a City websites in selecting what sights to see in a given day. Because my son had booked to see my nephew and his girlfriend in Tokyo for the first night, I had to plan a place that could see for the day because we had to return to Tokyo that night. My friend suggested for us to go to Nikko, since it was relatively close to Tokyo. That meant we needed to book our accommodation that night in Tokyo. The next three nights will be allocated for Kyoto, and the last night in Osaka before returning to Yokohama, where my son was based. Once I decided on what we were going to see, it was time to book our accommodations.
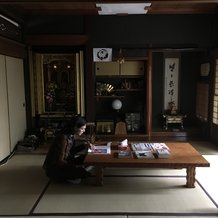
Book your Airbnb accommodations ahead of time, and try to find places closest to visiting the sights. Because we were going at Cherry Blossom peak season, the best accommodations went quick. Although the places we stayed were still good, we had to stay in Osaka rather than in Kyoto. This meant more commuting time to get to the sights. It took around 30 minutes to commute from Shin-Osaka Station to Kyoto Station. It is best to stay in one place for as long as possible. Airbnb accommodations in Japan is not like staying in a hotel, where you can drop your luggage off even before check in time. Airbnb check in times are around 3pm and check out times are at around 10am. That means you will have to figure out where to put your luggage every time you switch accommodations. I made the exception to stay in an old traditional Japanese home which was very cool but really far away from the sights. But it was totally worth the trouble. We had the first night in Tokyo, 2 nights in Osaka, and the last night we will spend in Yokohama. Before you book your accommodations, make sure you know exactly how far away it is from the subways and JR Lines. It’s best to find accommodations near a JR Line. Your Japan Rail passes are can be used on JR lines but not on subway lines. That means, you will need to pay extra if your accommodations are located near a subway line, rather than near a JR Line. Now that your accommodations are booked, time to plan your trip.
Given the short time you will have each day to see the sights, have meals etc, it’s best to plan each day from start to finish logistically. If you are not checking in till that evening, where do you plan to stash your luggage? We made the big mistake in attempting to keep out luggage at the Kyoto Station. So did hundreds of other travelers. We ended up lugging our luggages with us the first day in Kyoto and it was miserable. Since we were staying near Shin- Osaka station, that would have been a better place and less crowded station to store our luggage and near our Airbnb accommodation. Your Airbnb hosts are pretty good about giving you step by step picture instructions on how to get to their places from the JR Lines or subway station. If not, please request for them. Most likely, you will end up checking in your luggage at the train station first thing in the morning, going to your tourist sights, then picking up your luggage at the train station before finding your Airbnb home for the night or two after you are done touring and having dinner. If you can stay at that one place for two to three nights and even four, that would be best. When visiting Kyoto and Osaka, or even Nara, you can stay in the same Airbnb accommodation and just commute via train. It is a hassle to switch lodgings.
Given the short time you will have each day to see the sights, have meals etc, it’s best to plan each day from start to finish logistically. If you are not checking in till that evening, where do you plan to stash your luggage? We made the big mistake in attempting to keep out luggage at the Kyoto Station. So did hundreds of other travelers. We ended up lugging our luggages with us the first day in Kyoto and it was miserable. Since we were staying near Shin- Osaka station, that would have been a better place and less crowded station to store our luggage and near our Airbnb accommodation. Your Airbnb hosts are pretty good about giving you step by step picture instructions on how to get to their places from the JR Lines or subway station. If not, please request for them. Most likely, you will end up checking in your luggage at the train station first thing in the morning, going to your tourist sights, then picking up your luggage at the train station before finding your Airbnb home for the night or two after you are done touring and having dinner. If you can stay at that one place for two to three nights and even four, that would be best. When visiting Kyoto and Osaka, or even Nara, you can stay in the same Airbnb accommodation and just commute via train. It is a hassle to switch lodgings.
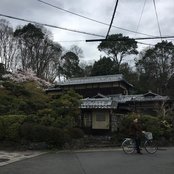
Seeing Akashiyama via bicycle turned out to be great advise. Right outside the train station, you will find the bike rental place. For Y1,000 ( less than US$10), you can rent bikes from 10am til 5pm. So worth it.
For directions how to get from the train stations to the various sights, check Japan-guide.com. Make sure you use their recommended directions via train, bus or walking distances so you have options. There will be times, you would prefer to talk from one sight to the next, so you can enjoy the ambiance. The workers at the train stations are very helpful in giving directions towards the popular sights. Most of the time, their English is limited so it’s best to plan ahead.
For directions how to get from the train stations to the various sights, check Japan-guide.com. Make sure you use their recommended directions via train, bus or walking distances so you have options. There will be times, you would prefer to talk from one sight to the next, so you can enjoy the ambiance. The workers at the train stations are very helpful in giving directions towards the popular sights. Most of the time, their English is limited so it’s best to plan ahead.
TIPS ON USING THE JAPAN RAIL PASS TO KYOTO, OSAKA & NIKKO
1. Buy your Japan Rail Passes online. Purchase the pocket wifi rental as well. I do believe, you can pick these up at the major Japanese airports. To get your Japan Rail Pass voucher changed to your personalized pass, go to the Japan Rain Counter at a major Japan Rail Station. Make sure to bring your your passport with you. Allow time cause the line gets long especially during peak seasons and the processing takes some time. Do not lose this pass cause it cannot be replaced.
2. Plan ahead -
a. figure out what sights you want to see per day;
b. book your Airbnb accommodations; and
c. logistically, map out how to get to your Airbnb accommodations to your sights and restaurants, and back.
d. create your daily step by step itinerary and put it on your mobile phone, iPad and/or print out.
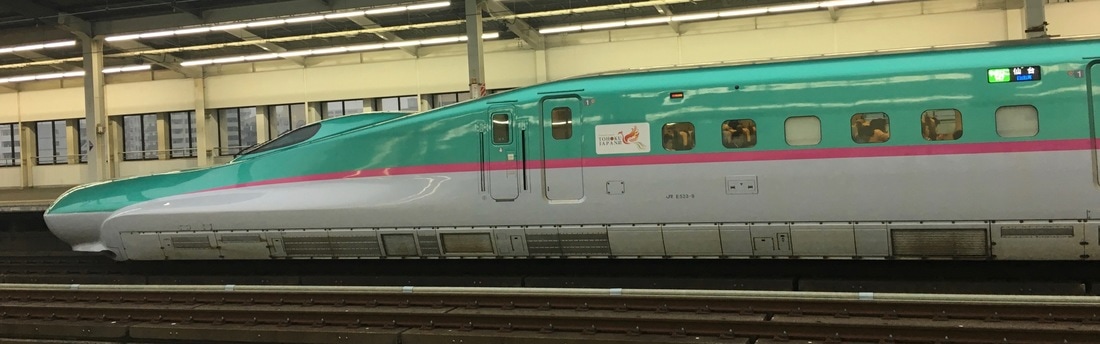
3. Best to travel light. You can take the train to the city from the airport. You can start your Japan Rail Pass from the Airport already. But note, that will start your pass and it will count as your first day of your pass. If you have allot of luggage, best to take the limo bus to your first destination - be it Tokyo or Yokohama, in my case. Although it will be more expensive, you will have carts to use to the bus. It’s not so easy to use the trains with allot of luggage. There are no carts plus at times, you will need to take the stairs.
4. Get recommendations from friends regarding restaurants and their favorite sights. One such tip was to buy pork buns (siopaos), siomais and gyozas from 551 Horai at the Shin-Osaka Station and I believe the Kyoto Station has this store as well, before getting on the train back to Tokyo. It’s a long trip back and you will get hungry. I kept these buns in my backpack and came in handy while sight seeing.
5. There are Family Marts and 7 Eleven stores almost everywhere. Best to locate one near your accommodations. They have hot coffee in cans and these rice buns with various meats, some wrapped in nori (seaweed) that can provide as breakfast on the go. Please note: Japanese don’t eat on the go except on the Shinkansen (bullet train). You don’t see them eating on the streets or the regular subway cars. Where you buy your coffee, you can sit and eat your snacks.
6. You will not find any trash cans almost anywhere. You will also not find any trash. Japanese take their trash home or throw them in receptacles at train stations. Trash is segregated so look at the visuals.
7. Everyone lines up so don’t be rude. Line up where it is indicated.
8. When taking the subway, always ask the train employee manning the turnstile how much your fare will be for the distance you are going, so you know what fare to purchase from the machines before you enter.
9. When taking the bus, you enter the bus from the back, and exit and pay in the front. Best to keep coins available. It usually costs Y240 per trip unless the bus driver tells you otherwise. You do get change if you don’t have the exact payment.
10. Check the weather before you go so you know how to prepare. Bring an umbrella and rain jacket if you are traveling during spring. Wear comfortable walking shoes cause you will be clocking in 20,000 steps per day.
11. Take a small backpack with you to put your pocket wifi, itinerary, umbrella, rain jacket, water bottle and snacks.
12. No matter how best you plan, it doesn’t always work out the way you plan. Remember, our itinerary is merely a guide. Be flexible and go with what moves you.
You can download our itinerary for our 5 day trip.
1. Buy your Japan Rail Passes online. Purchase the pocket wifi rental as well. I do believe, you can pick these up at the major Japanese airports. To get your Japan Rail Pass voucher changed to your personalized pass, go to the Japan Rain Counter at a major Japan Rail Station. Make sure to bring your your passport with you. Allow time cause the line gets long especially during peak seasons and the processing takes some time. Do not lose this pass cause it cannot be replaced.
2. Plan ahead -
a. figure out what sights you want to see per day;
b. book your Airbnb accommodations; and
c. logistically, map out how to get to your Airbnb accommodations to your sights and restaurants, and back.
d. create your daily step by step itinerary and put it on your mobile phone, iPad and/or print out.
3. Best to travel light. You can take the train to the city from the airport. You can start your Japan Rail Pass from the Airport already. But note, that will start your pass and it will count as your first day of your pass. If you have allot of luggage, best to take the limo bus to your first destination - be it Tokyo or Yokohama, in my case. Although it will be more expensive, you will have carts to use to the bus. It’s not so easy to use the trains with allot of luggage. There are no carts plus at times, you will need to take the stairs.
4. Get recommendations from friends regarding restaurants and their favorite sights. One such tip was to buy pork buns (siopaos), siomais and gyozas from 551 Horai at the Shin-Osaka Station and I believe the Kyoto Station has this store as well, before getting on the train back to Tokyo. It’s a long trip back and you will get hungry. I kept these buns in my backpack and came in handy while sight seeing.
5. There are Family Marts and 7 Eleven stores almost everywhere. Best to locate one near your accommodations. They have hot coffee in cans and these rice buns with various meats, some wrapped in nori (seaweed) that can provide as breakfast on the go. Please note: Japanese don’t eat on the go except on the Shinkansen (bullet train). You don’t see them eating on the streets or the regular subway cars. Where you buy your coffee, you can sit and eat your snacks.
6. You will not find any trash cans almost anywhere. You will also not find any trash. Japanese take their trash home or throw them in receptacles at train stations. Trash is segregated so look at the visuals.
7. Everyone lines up so don’t be rude. Line up where it is indicated.
8. When taking the subway, always ask the train employee manning the turnstile how much your fare will be for the distance you are going, so you know what fare to purchase from the machines before you enter.
9. When taking the bus, you enter the bus from the back, and exit and pay in the front. Best to keep coins available. It usually costs Y240 per trip unless the bus driver tells you otherwise. You do get change if you don’t have the exact payment.
10. Check the weather before you go so you know how to prepare. Bring an umbrella and rain jacket if you are traveling during spring. Wear comfortable walking shoes cause you will be clocking in 20,000 steps per day.
11. Take a small backpack with you to put your pocket wifi, itinerary, umbrella, rain jacket, water bottle and snacks.
12. No matter how best you plan, it doesn’t always work out the way you plan. Remember, our itinerary is merely a guide. Be flexible and go with what moves you.
You can download our itinerary for our 5 day trip.


 RSS Feed
